Here's what I've done in the past couple of days:
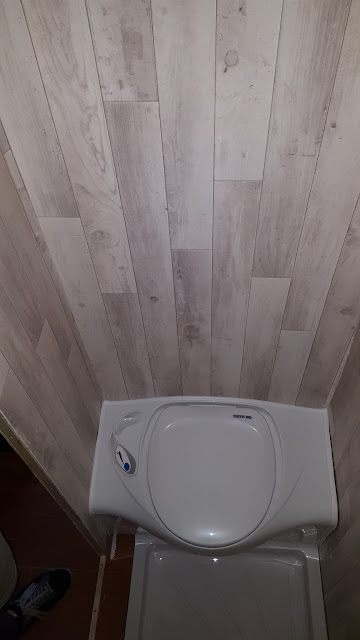
Added final piece of vinyl flooring to bathroom wall and fitted toilet
Made front for "poo door"
Starter some of the carpeting
Made the over cab shelf
This was a bit of a pain as I had to fit the headliner back in first and cut holes for the battens. Only the battens then wouldn't fit across once the headliner was in! So had to cut them in half and fix them back together again. Then attach the shelf!! Annoying.
Started on bathroom floor and shower outlet
This was extremely annoying! The shower tray can only fit one way and the outlet was right above a chassis member underneath. This meant I couldn't just drill straight down. So I had to think of a way round it. I created a false floor and fit an angled outlet, therefore I could then put the hold in the floor away from the chassis member (See first pic). Once I'd cut the hole and fitted the outlet, I cut and fit battens for the false floor, then fit 12 inch ply over it. Oh, you may spot my mistake! I cut the hole in the wrong place at first haha. No idea how but decided I could still use the piece anyway.
Waste fittings
I decided to get both of the waste outlets sorted. So I first fit the shower pipe to the waste tank. This was simple, as I'd positioned the hole very close to the tank. So just used cable ties to secure it in place. The sink waste outlet was slightly harder. I first attached the fitting and then drilled a big enough hole in the wheel arch for the pipe to fit through. This would then need to go across the under side of the van and to the waste tank. Once the hole was cut I threaded enough pipe through from the outside and connected it to the outlet. Again using cable ties. I then sealed around the fitting.
Then it was time to get underneath and route the pipe. I used several bits on the body to secure the pipe to, being careful not to put it next to anything to hot or moving! once it was secured, I attached it to the waste tank the same way as the shower one. I then went back and sealed the hole in the wheel arch using sealant and mastic tape. Once these have set, I will try and test to make sure everything goes to the waste tank without any leaks!! EEK!


0 comments:
Post a Comment